UART Tip #50: “UART Dark Tips” with Jen Evenhus
Have you tried UART Dark yet? If not, you have a treat waiting for you!
And a bit of a learning curve when sliding that first stroke of pastel across the unique surface of UART Dark. The Dark comes in comparable surface grits as the regular beige colored paper such as 320, 400, 500, etc. You can get sample grit packs to experiment with which grit is more conducive to the way you work.
When I first began using the Dark paper, I just assumed the surface would be exactly the same as the beige UART paper, but soon realized that there is a slight difference to the way the surface grabs the pastel and how many layers are possible before the tooth is filled. The surface feels smoother somehow –
and I like that.

Example (A)
One of the first things I noticed is how different the value of certain sticks is when placed on the dark surface. I found that I needed to choose a darker value to get the result I was after, compared to the value I would have used on the beige paper. I did a little experiment shown here (A) to show you what I mean. I’m sure it has to do with the contrast of the dark paper against the hue, making it look lighter/brighter. So, the solution is simple – use a bit darker value when using UART Dark.
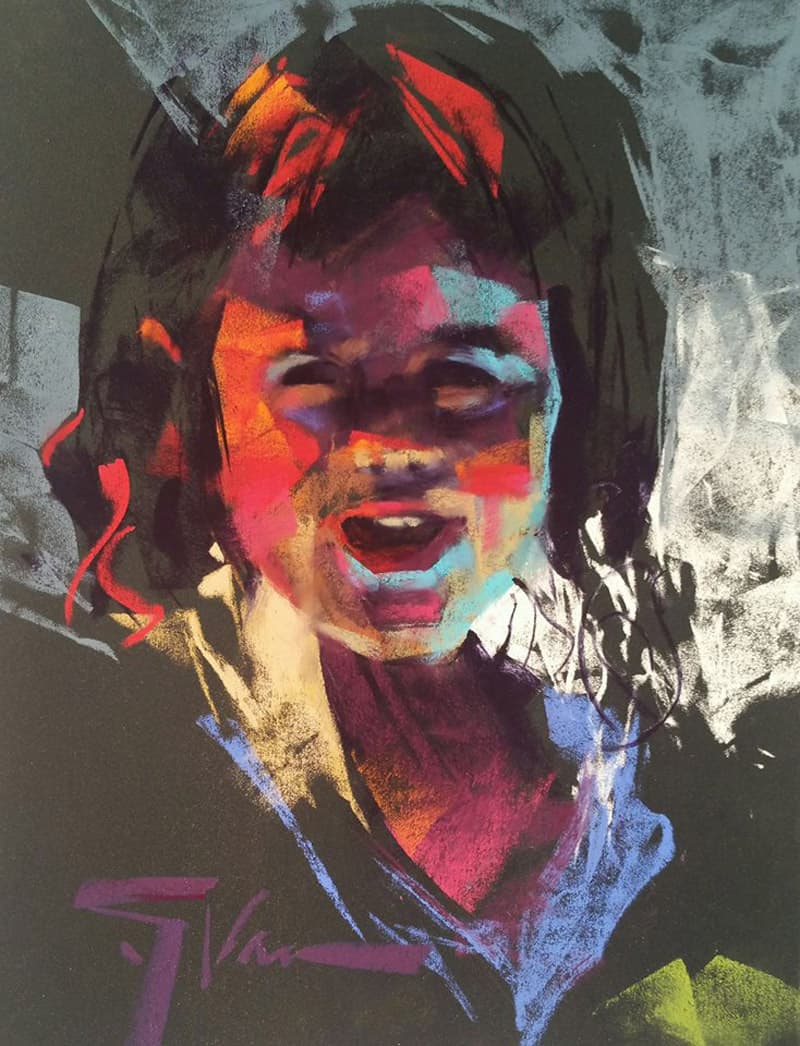
“Jasmine” – Example (B)
The second thing you’ll notice is that the UART Dark is not black.
It is a dark gray. At first, I was a little disappointed because I really wanted it to be Black Black! But after using it for a while, I realized that dark gray gives you more options. You can leave it showing through as a dark neutral and add a true black pastel in those areas that you want to be VERY dark, as shown in “Jasmine” example (B). Notice a lot of the background is left the original UART Dark gray and I added some dark areas to the hair, eyes, and eyebrows.
And third – don’t cover up all the dark – let some of it peek through – otherwise, why use the Dark when you can easily use UART beige? There are a couple ways to achieve that

“Aspen Dance” – Example (C)
First, simply don’t paint on certain portions of the picture plane – allow the dark gray to be dark gray! Another way to utilize the dark gray is to vary the pressure you use when making your stroke. A heavy-handed stroke will fill the tooth, covering most of the dark gray; a medium stroke will allow some of the dark to show through, changing the color you have placed – akin to mixing black with that hue; and when you lightly drag your pastel stick across the surface, you get a wonderful faint dusting – allowing for all kinds of texture depending on your stroke and pressure. See my painting, “Aspen Dance” example (C).
To sum up my UART Dark critique – I love it! It is worth trying out and experimenting with. You can get some exquisite results with this unique surface!
Jen Evenhus
Check out Jen’s art at www.jenevenhus.com